ActiveCampaign has been working hard to improve the automation building experience, with a cleaner, faster interface, as well as in improved Action search. In this blog I will take a look at some of the features which I think will offer you the biggest wins.
How do I try the new builder experience?
The first question is, how can you switch this on in your account. The new builder is available on all plans and to access it, all you need to do is go to an existing (or new) automation and toggle the switch that will show in the top left-hand corner of your screen.
It’s as simple as that. 😊
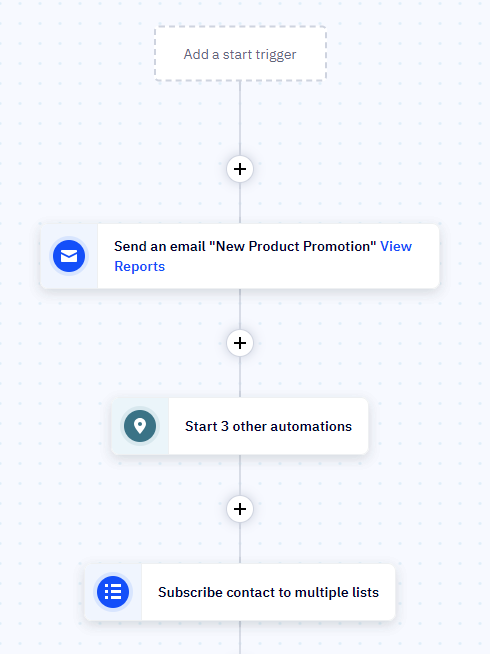
If you are in an existing automation that has actions, you will immediately see a change in the look of the screen. The actions, which were previously all different colour block are now all white with a coloured icon to the left-hand side.
Old builder

New builder
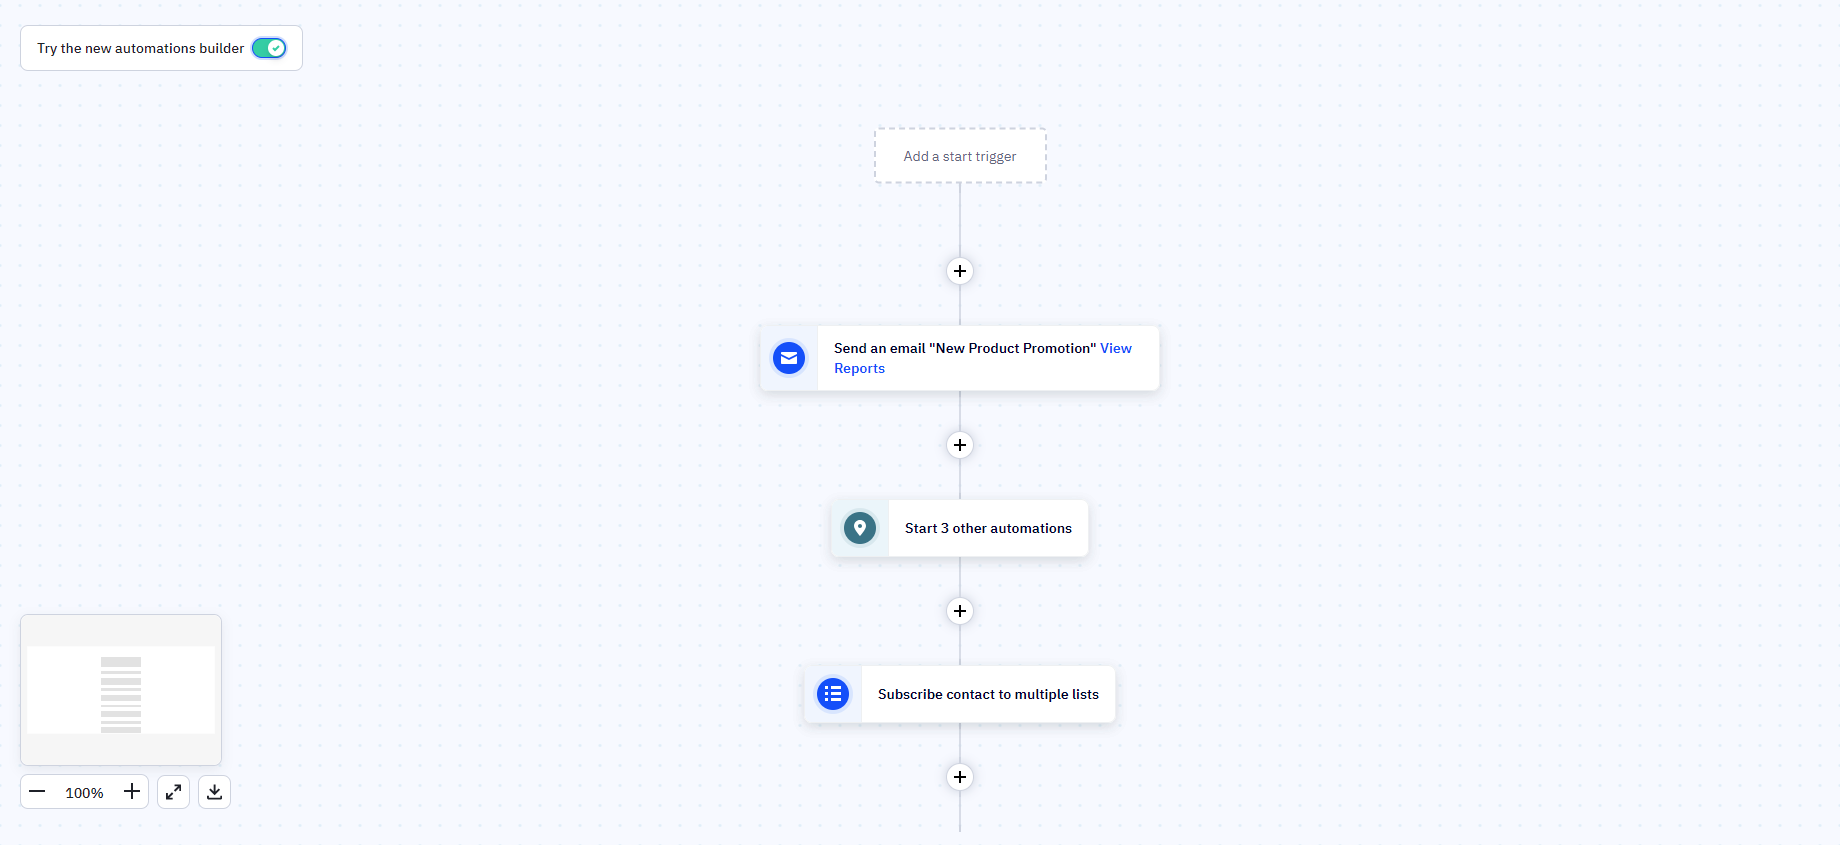
If you are working on blank canvas, the only difference you will see is that the action bar on the right of the screen vanishes, making a greater area of the automation map visible to you, which can be extremely helpful in larger automations.
Old builder

New builder
The modal Actions panel
As before, when you want to add an action to your automation, you now do so by simply clicking the “+” icon at the position you wish to add the action. While this will be a change in thinking for those of us who tended to drag and drop the actions from the ever-present panel, the new modal Actions window is much nicer than the older one, giving you clear and easy access to the actions you need.
It also includes a really handy Search function, so you don’t have to scroll through the tabs looking for the right action. Just type in which action you want and get going.
It also offers AI generated suggestions, to help you enhance your automation further. While this can be helpful, I would personally still recommend taking the time to plan your automations out in advance of building them.

Now let’s look at some of the actions in more detail to give you an idea of how these might have changed. I am not going to go through all of them as many are the same as before, just with a slightly updates look, but there are a couple that I think are worth highlighting.
Send an email
Let’s start with the “Send an email” action, as this one has probably changed the most.
The action starts with the previous steps where you chose whether you wanted to Create a new email or Start with an existing one (or whether to Save and Design the email later), but this initial step now also includes a really helpful option to choose one of the emails which are already saved within the automation.

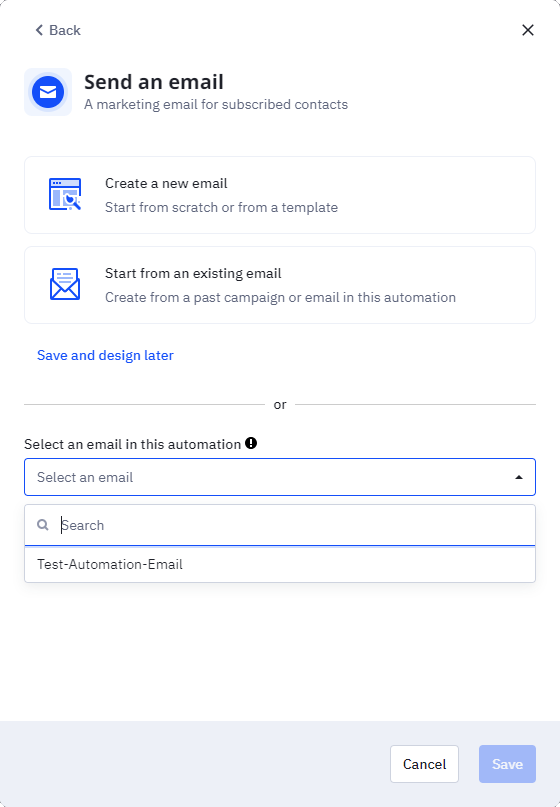
While this is nice, it is however, the second step where you will really start to see the differences.
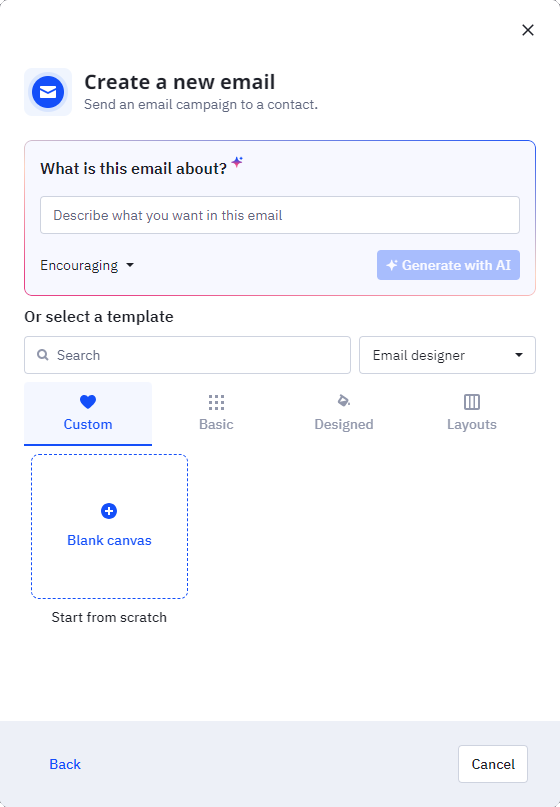
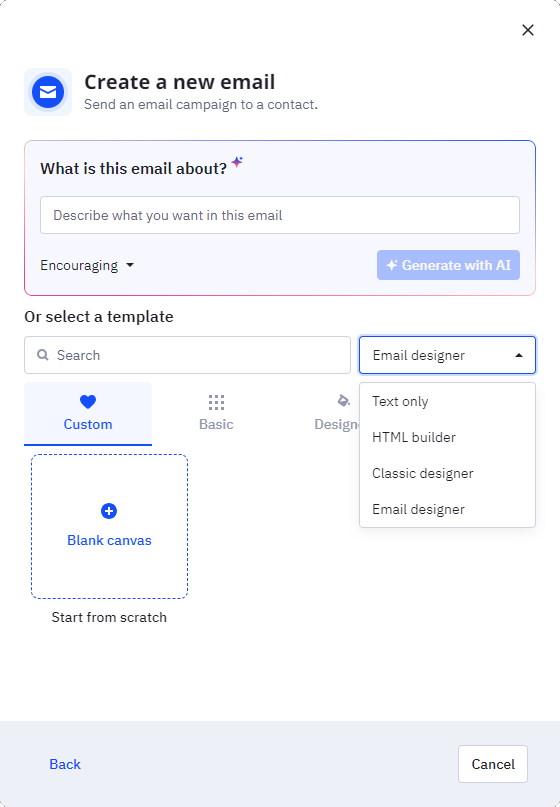
The first thing you will notice is the option to use AI to generate a draft design for the email.
There is a handy dropdown which offers you a choice of tones for the email content, and it will even pull in the kind of image you may like to use. (Of course, as with all things AI generated, please make sure you go in and edit it, to make sure it really matches what you are trying to convey.)
Underneath the AI generation option, you have the choice to select the kind of template you wish to use. This will vary based on the designer you select in the dropdown on the right-hand side of the box, which defaults to the most recent version of the Email designer.
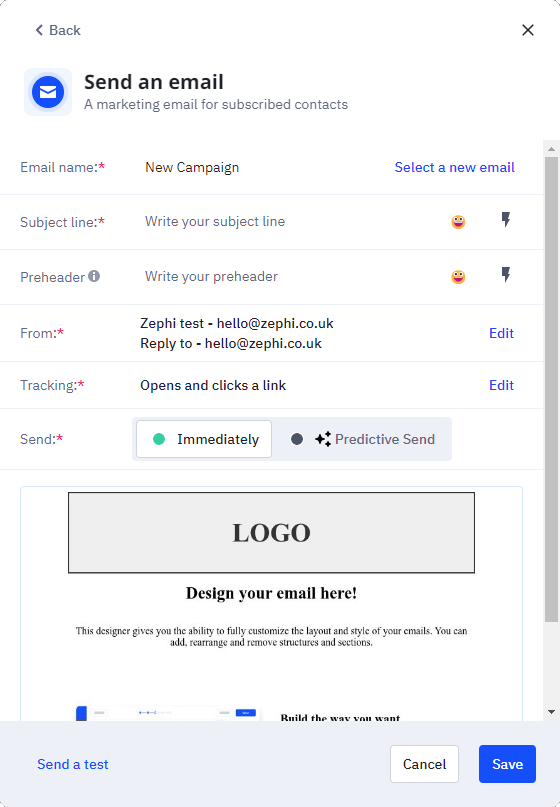
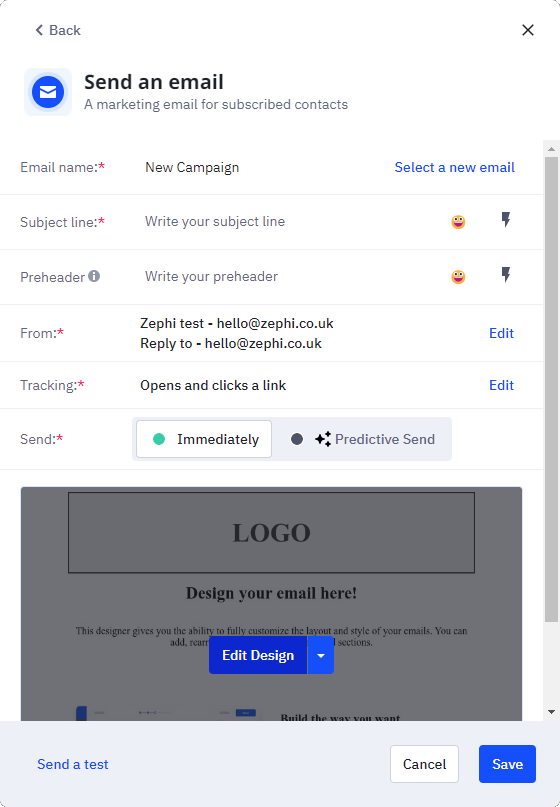
Once you have selected your template, the next step you are presented with is a condensed version of the new campaign workflow, where you can set your name of the email, the subject line and preheader text, define the From/Reply details, and manage the Tracking all in the Action modal.
This is a massive time-saver, as it is one less step for you to go through when building your automation emails.
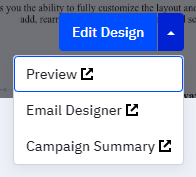
To edit the email itself, simply hover over the preview at the bottom of the window and the “Edit Design” button will appear.
And this Edit Design button allows you to do three additional things too, including previewing the email in a new tab, so you don’t have to go into the designer first in order to see the preview. This small win could save your team lots of time. In addition, you can open the designer in a new tab, in case you want to keep working on the automation at the same time.
And you can open the Campaign Summary in a new tab as well, so you don’t have to navigate back to the automation after you have checked how well the email is performing.
Internal Notifications
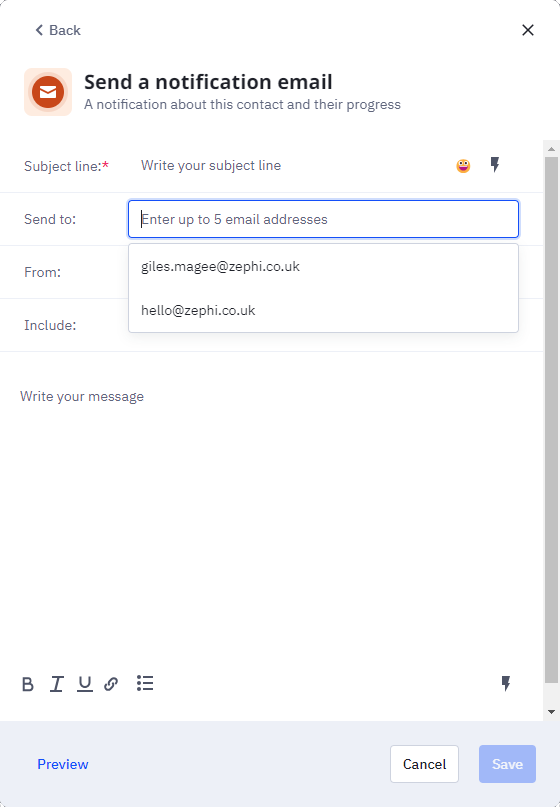
The action to send a notification to your team has been renamed “Internal Notifications”, which is helpful in making a distinction between this action and the “Send an Email” action. The modal window is now a lot cleaner as well, giving you more space to work with.
The message area allows you to use Personalization tags as before, so you can craft a useful notoification containig any of the Contact’s information. However you can now also format the text uch better, includung adding hyperlinks, making this an even more useful action.

You can select up to 5 email addresses to send the notification to, but where before you had to manually type the email addresses in, you are now automatically presented with a list of all your account users, which is a huge improvement.
You can of course still manually enter email addresses and personalization tags, e.g. %DEAL_OWNER_EMAIL%.
And you can of course still preview the message and choose whether you want to have a link to the Contact record and/or all of the contact’s custom fields.

The If/Else, Goal and Wait Conditions
One of the biggest changes in these actions is the addition of the “Saved Segments”. Having the option to simply select one of your predefined Segments is a massive timesaver, meaning you do not have to rebuild your conditions each time.

Start / End an Automation
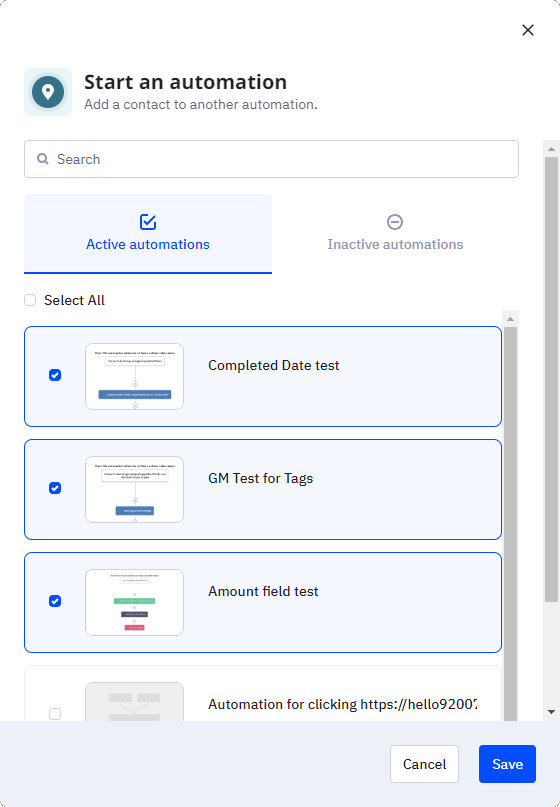
I am so excited about this change, as the usability has been drastically improved for the Start and End an Automation actions!
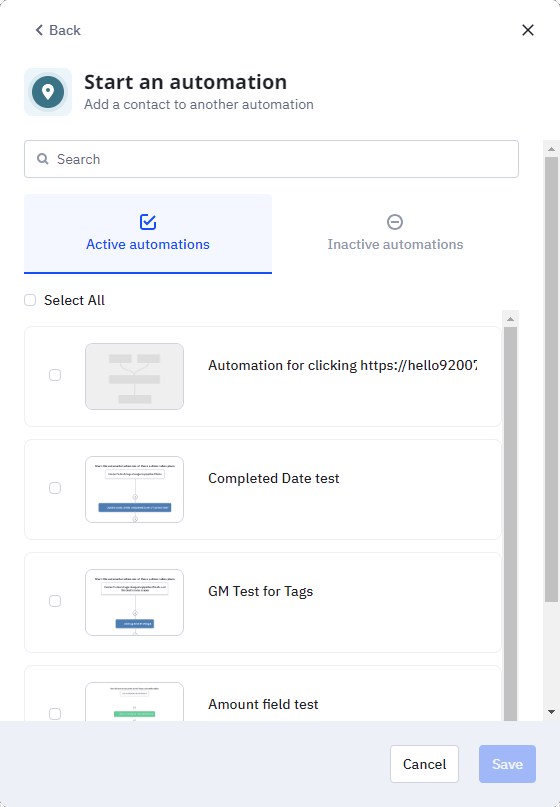
First of all, the layout of the modal window is so much better. Rather than simply having a list of all your automations, they now include a small screengrab of the automation, but more importantly, they are separated by their status, meaning you can choose whether you want to view your Active or Inactive Automations.
But much more helpfully, once you have selected the automation(s) you want to Start/End, these are now displayed at the top of the screen, highlighted with a border, so you no longer have to scroll through the list, hoping to find the affected automations!
I could geek out and go on about the other actions, all of which have benefited from the cleaner, more spacious look the modal window offers, but I will end this blog with just one last change I think you will find helpful.
The Mini Map
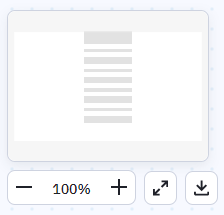
This feature has been in the Automation builder for a while now, but you may have missed it, so I want to draw your attention to it.
In the bottom left corner of the Automation canvas, you now have a small window which shows a map of the automation. You can use the Mini Map to quickly scroll around the automation, helping you jump to any part of the workflow that much more easily. This is a huge benefit for those of us who build large, complex automations.
It also offers you the ability to download the automation map as a PNG file, which is useful if you ant to store it for documentation purposes or share it with a colleague. However, do be aware that the file created for large automations does become quite difficult to read. 😬
If you would like some help getting the most out of your Automations or would like to discuss anything related to your ActiveCampaign account, please do get in touch. Drop us a line at hello@zephi.co.uk or call us on 01543 523 950.